Building .NET MAUI with GitHub Actions
Posted on November 24, 2021 • 4 minutes • 820 words
Table of contents
If you’re a fan of using GitHub Actions or Azure DevOps, you might have had some trouble configuring builds for .NET MAUI. This is likely due to needing specific workloads installed and understanding what parameters to use for a single project to compile for multiple target platforms.
In today’s post, I’ll show you how to setup your build that will work for any MAUI target platform. If you would like to review the final result as you read through this, here’s the workflow file => DevOpsExamples/main_build-maui.yml .
Using Separate Jobs
First, let’s set up the top level structure of the workflow. It’s best to have separate jobs for each platform, this will allow you to use a different types of runner for each job (e.g., Windows or MacOS).

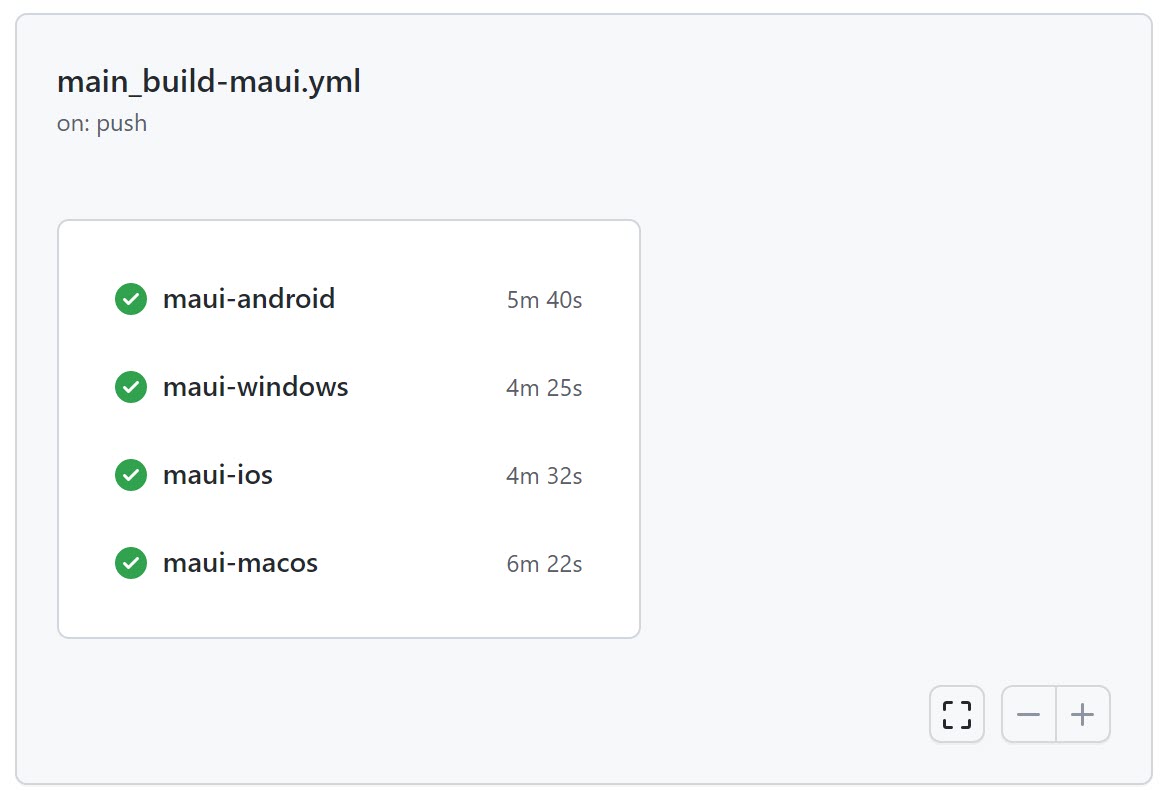
Four jobs, one for each target platform.
Additionally beneficial is the fact that all the jobs run in parallel, saving you a significant amount of time. For example, these fours jobs finished in 6 minutes, instead of 20 minutes!

This is what a multiple job workflow looks like in GitHub Actions.
Setting Up .NET 6
At the top of your workflow, immediately after the repo is checked out, you’ll want to install the tooling and SDKs needed.
First, you want to install the version of .NET you need (e.g., .NET 6 for MAUI projects).
    - name: Setup .NET Core SDK
      uses: actions/setup-dotnet@v1
      with:
        dotnet-version: '6.0.x'
Windows Note: If your project has a Windows target, you will also need to add MSBuild to PATH. This is done with the following step and is only needed on Windows runners. On MacOS, you always use dotnet build.
    - name: Setup MSBuild.exe
      uses: microsoft/setup-msbuild@v1.1
      with:
        vs-prerelease: true
Installing .NET Workloads
Now, with the SDK installed, we want to add a step that installs the platform workloads and the .NET MAUI workloads.
    - name: Install .NET workloads
      shell: pwsh
      run: |
        # Step 1. Install the platform workloads (you don't need one for Windows)
        dotnet workload install android
        dotnet workload install ios
        dotnet workload install maccatalyst

        # Step 2 (recommended). Install the .NET MAUI workloads for all the target platforms
        dotnet workload install maui

        # Step 2 (alternative). If you only need to build for a specific platform, you can use individual installers instead.
        # dotnet workload install maui-android
        # dotnet workload install maui-ios
        # dotnet workload install maui-desktop # Needed for Windows build
        # dotnet workload install maui-maccatalyst
NuGet Package Restore
With all the tools installed, it is time to prepare for the build by doing a NuGet package restore.
    - name: Restore NuGet packages
      shell: pwsh
      run: |
        dotnet restore MauiDemo.csproj
If you have a dependency on a package that comes from an authenticated NuGet server, you would instead pass a nuget.config file path and set the credentials using environment variables using GitHub Actions secrets.
    - name: Restore NuGet packages
      shell: pwsh
      run: |
        dotnet restore MauiDemo.csproj --configfile nuget.config
      env:
        TELERIK\_USERNAME: ${{ secrets.MyTelerikAccountUsername }}
        TELERIK\_PASSWORD: ${{ secrets.MyTelerikAccountPassword }}
Note: If your project has a Windows target, you will also need to add
Build
At this point, you are ready to build for your target platform. You need to know what that platform is in order to tell dotnet build what to do. In my demo, I am targeting the following frameworks
net6.0-androidnet6.0-iosnet6.0-maccatalystnet6.0-windows10.0.19041.0
So, in my Android job, I would use dotnet build, with the -f parameter for the target framework (note: I am using --no-restore because we already restored NuGet packages in the previous step).
    - name: Build Maui Android project
      shell: pwsh
      run: dotnet build MauiDemo.csproj -c Debug -f net6.0-android --no-restore
Windows Note: If you are building the Windows project, you use msbuild instead of dotnet build and set the Configuration and TargetFramework parameters
    - name: Build Maui WinUI project
      shell: pwsh
      run: |
        msbuild MauiDemo.csproj -r -p:Configuration=Debug -p:TargetFramework=net6.0-windows10.0.19041
For more information about msbuild parameters and flags, visit the Microsoft docs at MSBuild Common Properties and MSBuild Switches .
Live Demo
Instead of pasting some YAML in here, which will go stale over time, go and check out the live demos I have on GitHub at https://github.com/LanceMcCarthy/DevOpsExamples .
Take a moment to skim the README to see the builds and pro-tips. I show you how to build all the following project types:
- ASP.NET Blazor
- Xamarin.Forms and .NET MAUI
- WPF and WinForms
- Console
- Angular, React and Vue
You’ll find the MAUI GitHub Action workflows in the workflows folder in the build-maui.yaml file. For Azure DevOps, you can find the pipelines here .
Release Builds and Publishing Apps
It is still a little early and things are evolving quickly with MAUI, once the tooling is complete in the spring of 2022 there will be a reliable way to bundle/package, sign and distribute the apps.
At that time I will write a follow up blog post to this one that shows you how to build in Release and prepare publishable artifacts from the workflow.

